The Master’s Cut: A Comprehensive Guide to Filleting Red Snapper
By. Fajar - 25 Feb 2026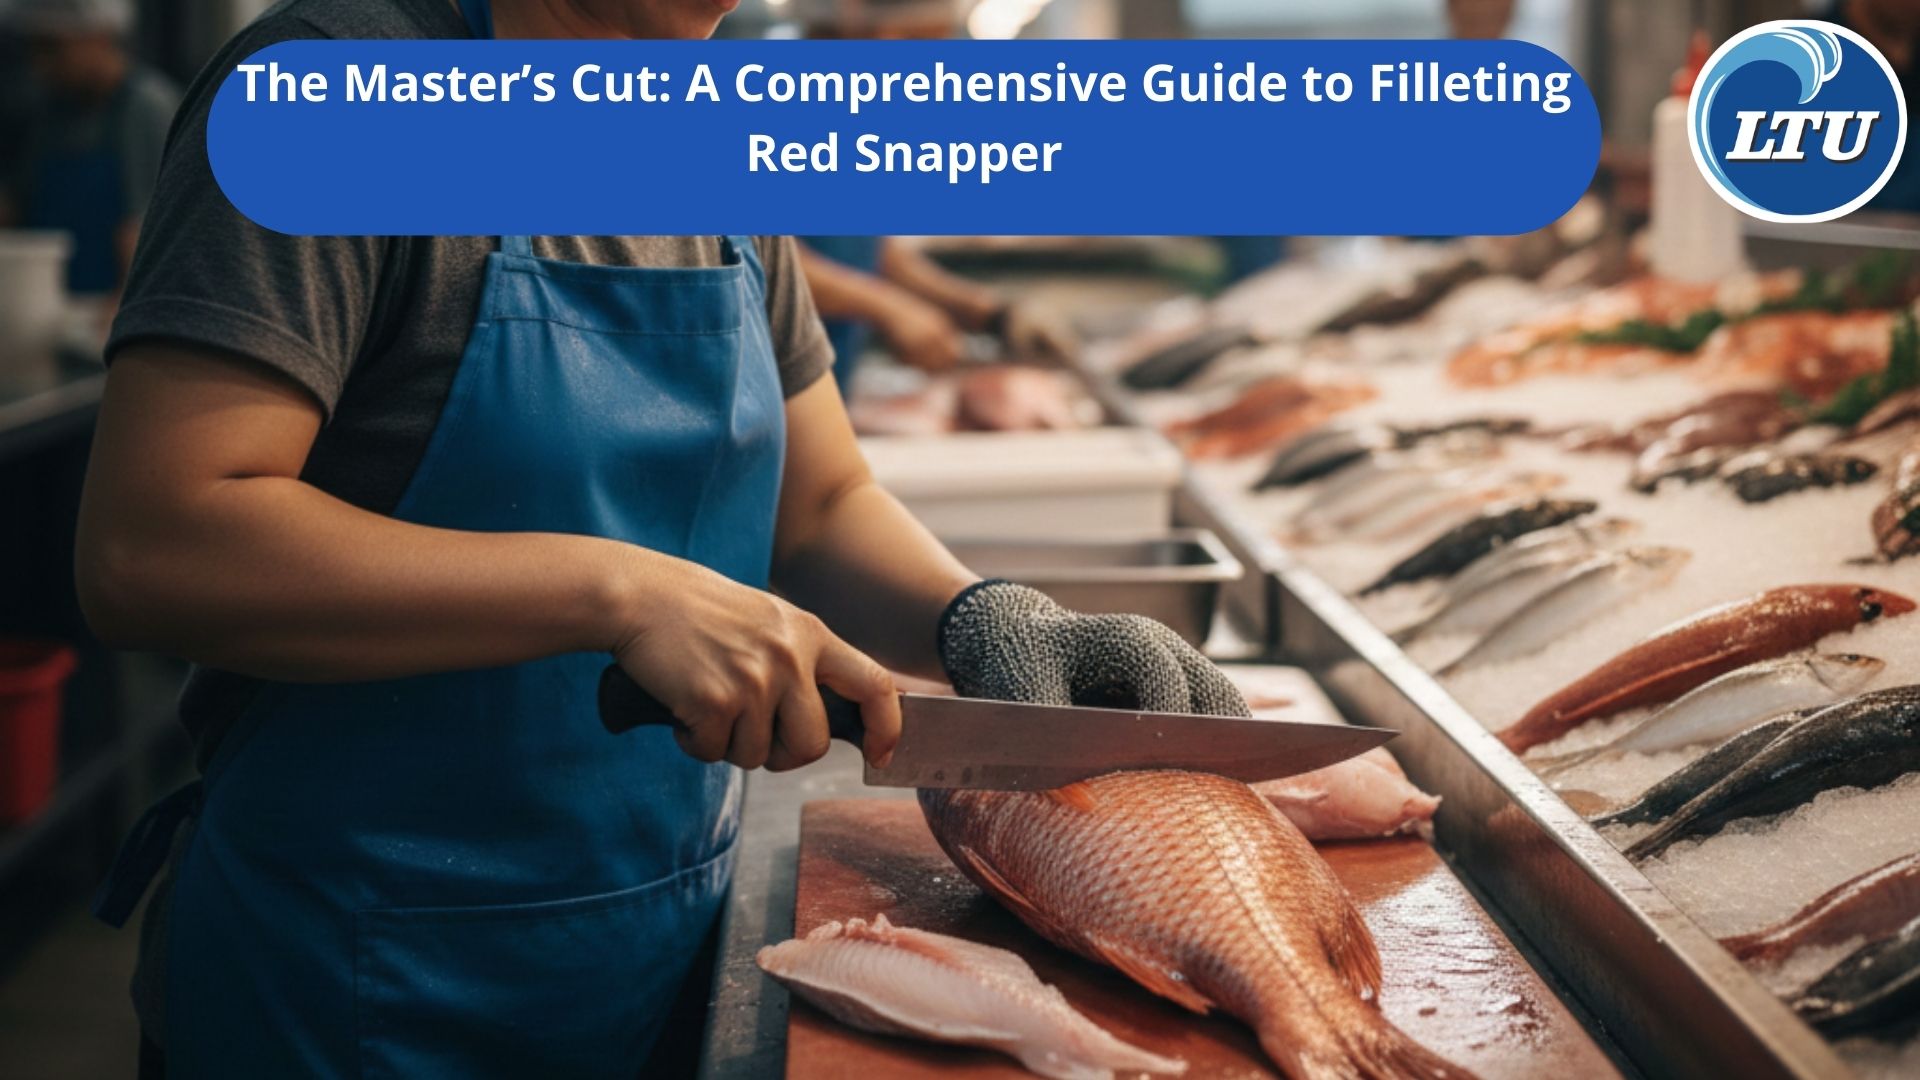
lauttimurutama.com Filleting a fish is more than just a culinary task; it is an art form that balances precision, anatomy, and respect for the ingredient. Among the many species prized by chefs and home cooks alike, the Red Snapper (Lutjanus campechanus) stands out. Known for its firm, white flesh and sweet, nutty flavor, the snapper is a versatile star in the kitchen. However, its large scales and sturdy bone structure require a specific approach to ensure maximum yield and a clean finish.
In this guide, we will walk through the professional process of transforming a whole Red Snapper into pristine, restaurant-quality fillets.
1. Preparation: The Tools of the Trade
Before the first cut is made, your workstation must be prepared. A dull knife is the enemy of a clean fillet; it tears the delicate flesh rather than slicing it.
- The Fillet Knife: Use a flexible, 6-to-8-inch fillet knife. The flexibility allows the blade to follow the curve of the ribs.
- The Scaling Tool: A dedicated fish scaler or the back of a sturdy knife.
- Stability: Place a damp paper towel or a rubber mat under your cutting board to prevent it from sliding.
- Safety: Consider a chainmail or cut-resistant glove for your non-dominant hand, as snapper fins are notoriously sharp.
2. The Clean Start: Scaling and Gutting
While many fishmongers sell snapper pre-scaled, doing it yourself ensures no stray scales end up in your final dish.
Hold the fish by the tail and scrape toward the head in short, firm strokes. Pay close attention to the area around the fins and the "throat," where scales tend to hide. Once scaled, rinse the fish under cold water. If the fish is not gutted, make a shallow incision from the vent (near the tail) up to the base of the throat and remove the entrails carefully to avoid puncturing the gall bladder, which can impart a bitter taste to the meat.
3. The Initial Incision
Lay the snapper flat on the board. Locate the pectoral fin (the one on the side). Lift the fin and make a diagonal cut behind the gills.
Expert Tip: Angle your knife toward the head. This allows you to capture the "cheeks" of the shoulder meat, which is often wasted in amateur filleting. Cut down until you feel the blade hit the backbone, but do not cut through it.
4. Following the Spine
This is the most critical stage. Turn the fish so the back (dorsal side) is facing you. Insert the tip of your knife at the top of the head where you made your first cut.
Using long, smooth strokes, run the knife along the dorsal fin, staying as close to the backbone as possible. You should hear a rhythmic "clicking" sound—this is the sound of your blade running over the rib bones. This sound confirms you are not leaving meat behind on the skeleton.
5. Navigating the Rib Cage
As you reach the middle of the fish, you will encounter the rib cage. Do not try to saw through these thick bones. Instead, use the tip of your knife to gently "peel" the flesh away from the ribs using a delicate sweeping motion. Once you clear the rib cage, push the knife all the way through to the tail and slice clean off.
Repeat the entire process on the other side. You should now have two beautiful fillets and a "frame" (the skeleton).
6. Refining the Fillet: Pin Bones and Trimming
Even the best cut will have pin bones—small, needle-like bones located along the midline of the fillet.
- Use kitchen tweezers or needle-nose pliers to pull these out in the direction the bone is pointing to avoid tearing the meat.
- Trim the "belly fat" or any ragged edges to give the fillet a professional, symmetrical look.
7. To Skin or Not to Skin?
Red Snapper skin is delicious when crisped up, but some recipes call for skinless fillets. To skin the fish:
- Lay the fillet skin-side down.
- Grip the tail end firmly.
- Insert the knife between the skin and the meat.
- With a slight sawing motion, move the knife forward while keeping it tilted slightly downward toward the skin. The skin should peel away in one continuous piece.
Summary Table: Key Milestones
|
Step |
Action |
Objective |
|
Scaling |
Tail-to-head scraping |
Remove armor-like scales for better texture. |
|
Shoulder Cut |
Diagonal cut behind gills |
Maximize yield by capturing shoulder meat. |
|
Dorsal Slice |
Follow the backbone |
Ensure the fillet is separated cleanly from the spine. |
|
De-boning |
Use tweezers for pin bones |
Create a safe, premium eating experience. |
If youre interested in our Red / Scarlet Snapper Whole Round / Whole Gilled Gutted Scaled,Emperor Fillet Skinless,White Snapper Pearl Perch Whole Round / Whole Gilled Gutted Scaled please do not hesitate to contact us through email and/or Whatsapp